Saturday, April 28, 2012

Patchwork Blankets - Labor of Love

A Grandmother's Garden Quilt
Picture from better-homes-gardens
My grandmother used to make us patchwork blankets when I was growing up.  Her favorite designs are similar to that Grandmother’s Garden Quilt that you can see in the picture left.  Grandma made all her blankets with fabric scraps and she would patch the pieces together using the traditional English Paper Piecing methodFor as long as I can remember, the hexagons on my grandma’s blankets are typically around 6 – 7cm in diameters - a little larger than some of the shapes on patchwork blankets that I have seen. My guess is that grandma did not have the patient or time to work with small hexagons.

Having that said, I will always get a new blanket from grandma whenever I outgrown the blanket size that I had. Grandma eventually had to stop sewing when her eyesight can no longer supports her to do such delicate works. However, her blankets continue to keep her grandchildren warm and cozy at night and for many years after she stopped sewing.


My first patchwork blanket


I love grandma's blankets and the hexagon patchwork. In fact, I made my first patch blanket with the hexagon design using the English Paper Piecing method. I made the first blanket for my wedding bed based on my memory of how my friend's mother was making it during my regular visit to her house when I was a teenager. Today, after almost 14 years with little torn here and there on this blanket, I am still using it to keep myself warm and comfort each night. 

I was not exposed to many other fancier designs of patchwork or quilt in the past.  Everyone in this region seems to be making patchwork blankets with hexagons (Grandmother's Garden Quilt), square or rectangular shapes. Today, I had seen many beautiful patchworks using different shapes and patterns. But my favorite shape for patchwork remains the hexagon. There are so many possible designs you can create with the hexagon.

I have been making patchwork blankets for my kids since they were babies. Zen complains her elephant quilt blanket to be too warm and heavy. So, I started making a new one for her since 2 & 1/2 years ago!  I made it everyday at the beginning of the project. Then I got distracted and started taking break for days in between my sewing, eventually days turned into weeks and weeks turned into sometimes months. I made other sewing projects in between because I need seeing some finished projects from time to time.  It gives me a sense of accomplishments. I am spending more time making the blanket recently and it is because we are moving into our new house very soon. It will look beautiful on her new bed.  I purposely use an old bed sheet to sew the backing of the blanket because seasoned fabric is softer and more comfortable. Zen loves the lightness and softness of her new blanket and she also like the beautiful prints on it.


I didn't really have a clue of the design I first started the project. I was thinking I can create some random designs hexagons and diamonds that I had basted with loose stitches. I had chosen pink and green printed fabric for the color combination I added a bright pink plain fabric for a contrasting color effects and to create a chic country look. The finished work is an unusual ladder shape. It may not be a spectacular piece of work as compared to the works of many experienced quilters, but it is priceless to me, I hope my girls will appreciate my efforts and treasured these blankets, and hopefully they will pass on the tradition to their children in the future!


You may find tutorial sites on sewing hexagon patchworks below
http://www.youtube.com/watch?v=UcvpA3lqtkM&feature=related
http://www.ehow.com/how_8623212_sew-hexagon-quilt-block.html
http://www.quilterscache.com/G/GrandmothersFlowerGardenBlock.html

Monday, April 23, 2012

My Three Stooges Sock Toys

Three Stooges


I bought my first craft book using socks in 1985 when I was still in secondary school (high school).  It became one of my collection of three craft books. I don’t remember if I ever made any of the toys shown in this particular book, but they no longer appeal to me these days.


Though sock toys existed as early as the 19th century and regained its popularity back in the late 20th century, it was not known among many Malaysian until very recently.  I re-encoutered my passion with this form of arts when I came across a fascinating craft book in a bookstore a few years ago,  It was a craft book by a Taiwanese author, Danta.  I was inspired by his wonderful ideas. So, I bought it. 

I went through our socks at home and gathered few socks for the project as soon as I was home. Eagerly, I studied the structures and took tips on making  sock toys. I picked a pair of my husband's socks which are still  new for my first project because I love the simple design of men socks. Not following any sample from the book, I created this creature of my own( See picture on the left). This is not his original look. (Note his original look on the group photo above. He had gone through one plastic surgery to get his sexy lips and the big round eyes).                
I named him Muichi after the makeover. What's the meaning of the name? Well, this creature purses his lips like a child who is about to cry. The Cantonese call this " Mui Mui Chou". That’s how the Mui came about and Chi is simply to rhyme with it. Muichi is an innocent and loving creature. He is often being taken advantages of and therefore, he purses his lips all the time :)


My second socks creature was made with my daughter’s old socks. Meet Fri who is very friendly and was born on a Friday. 


Sock Monkeys: (200 out of 1,863)
About a year later, I discovered the coolest sock toys craft book - Stupid Sock Creatures by John Murphy and Sock Monkeys (200 out of 1,862) by Anne Svenson+Ron Warren on Amazon.com, a place I bought many of my books.  These are black and white photos book of 200 sock monkeys out of the authors astounding collection of 1,863 vintage sock monkeys. These books cost more at our local bookshops but I was fortunate to have a mailing address in the U.S. and an annual personal delivery service to bring them back to me . 


Polo has a long tail


I was so inspired by the book and after looking at 200 vintage sock monkeys, my third sock toy was naturally a sock monkey. It was made with brand new male  socks. Of course, the socks owner, my husband, hassled me for cutting his socks  again! The label for the sock is Polo, so it was named Polo.


It has been quite a while since I made Polo. I had with me two pairs of original Rockford Red Heel socks bought from Chicago last autumn.  It awaits my good mood to make craft out a classic sock monkey.

Click here for a tutorial from YouTube to make a classic sock monkey. With all the free tutorials available online, you don't even need to buy crafting and sewing books these days. Unless you are like me,  who doesn't always have access to the internet, and who loves hard copy versus the computer screen  It is a treat to own a book!

Wednesday, April 18, 2012

First Giveaway


It has been more than 18 months since I started this blog. I think it is time to thank you all who have been following by a giveaway gifts. At the same time, I am taking this opportunity to welcome new followers. 


To enter the giveaway is simple, just


1) Leave a comment here on this post
2) You must be a follower. If you are not, join/follow me on my new Linky button at the top of my sidebar if you are not Blogger.
3) For additional entry to win, please post the giveaway to any of your social networking sites (facebook, blogger and/or twiter), and don't forget to leave a separate comment her for each social networking site you posted the giveaway to. Please inform me on this.


If you choose to remain anonymous, please leave me your email address so I can contact you. You may email details to me at yannsjournal@gmail.com if you do not wish to leave email address on the comment column.


Giveaway closes on 30 April 2012. Winners name will be drawn and announce on 1 May 2012.


Winner may select only single alphabet for each cutlery bag. The alphabet appliqué fabric would be same or similar to the picture shown above.

Open to all 18 years and older

Friday, April 13, 2012

Handmade Cutlery Bags


NYZ - Ning, Yann & Zen


I consider cutlery bag an essential traveling item so I can keep the cutlery set safe and clean. It is useful for  kids who take their meals in school and adults who dine out regularly. Other than the reasons that it is more eco-friendly  and hygienic, I just do not enjoy eating with disposable cutlery. 

Every Saturday, my girls and I have to eat  in the car or at their learning centre  when we have to rush from one class to the other. The restaurants which I usually buy our food always supply me with flimsy plastic disposable cutlery. I think it is wasteful to dispose them after single use and I do not like to eat with them anyway. I used to pack our cutlery sets by wrapping them in serviette and threw them inside my bag. In fact, that was not a good idea. My daughter Zen stays back after school for curriculum activity every Wednesday. She has her lunch in school and need a proper storage for her cutlery set. Therefore, making cutlery bags for the family is something that I have been thinking about since last year. 

Made with unbleached burlap from Thailand


Rubber stamped cupcake applique
Unbleached twine recycle from paper bag
Made with unbleached cotton


I like the natural appearance of unbleached materials. For this project, I use unbleached cotton, laces and even the twine for the draw string. They are all natural and free from chemical bleach and dye -  ideal for storing cutlery or food item.

Do you like to have these bags in your chosen initials? Look out for Yann's Journal first giveaway that is coming up soon!

Tuesday, April 10, 2012

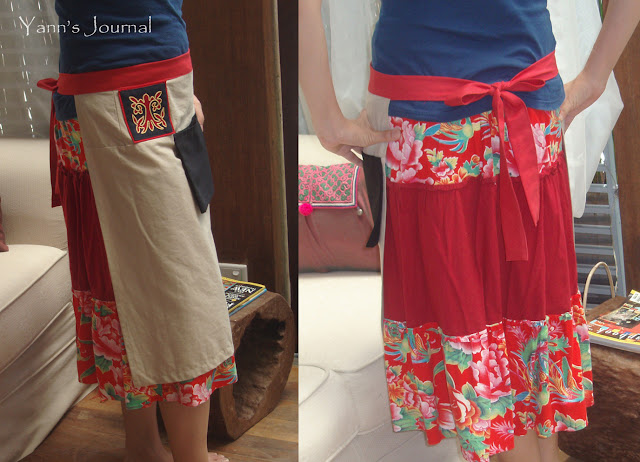
Zakka Apron with Ethnic Embroidery

I had shared on last two posts on the projects I did for a workshop with a NGO ran minority sewing centre in China . And here is another project I did  for the same workshop to design handmade crafts for the Yi minority people.


Coaster with Yi motif applique and embroidery


I had limited info and resources before arriving China, which I had to use whatever I could get hold for my preparation. I had with me two coaster with Yi designed motifs bought from a friend. The embroidery on the coaster was fine and beautiful. I was impressed with the effort of making a little coaster. Later, I had a chance to see the Yi ladies making these embroideries, and they were really skillful and fast in their sewing. With these two coasters, I had made two aprons with the same design.


2 pocket compartments 


One of the two aprons was given to a charming lady in the mountain and I kept the other one for myself.