Saturday, June 9, 2012

Mini Eraser Charm Bracelet


Turn mini erasers
into

Charm Bracelet


One morning during my younger daughter, Ning, two weeks school holiday, I brought her to a bookshop to buy books for her. She spotted a cute set of eraser in the bookshop and asked if she could have it. I bought her and her sister a book each and a really cute set of Korean made mini erasers.

The stationery these days are so pretty. Kids are drawn to their designs more than their functions. The set of eraser Ning picked looked more like candy and toy, so small in size that one may find difficulty to use it. She offered some of her mini erasers to her sister and cousins. Later, when she got tired playing with them, she asked me what could she does with them. I suggested making a charm bracelet with the erasers. Her eyes sparkled to excitement as she loves charm bracelet. 

We had a good time making the charm bracelet together. It was a quick project to make with the available materials and tools at home. Click here for Yann's tutorial page on making it.


Saturday, May 26, 2012

Spaghetti Straps Refashion Dress

I love the idea of refashioning unused garments into useful items. I have not done many projects with this concept but I would certainly make it my priority in the future. Here's a successful refashioned outfit I had made for my daughter to wear on her Teacher's Day celebration last Friday. This is her final year in Kindergarten and I wanted her to have a great time before she starts primary school (elementary school) next year. Life will be a little bit more stressful for her and the programs at the primary school can be very demanding. Hence, I came up with the idea of making her a dress for the celebration.


Before and After
After some brainstorming, I decided to make her something using the felt materials that was scattered around my crafting room. I had been making felt flowers in the last 3 weeks. I found an overstretched spaghetti straps singlet that had turned too big for me and transformed it into a halter neck dress for my daughter. As usual I do not sketch, I like to let my creativity flow in spontaneously as I work. I cut long straps of scallops with felt and sew them onto the bottom of the dress.  I stacked roll after rolls of straps and stopped just before the bottom became too heavy. With some trims and gathers; 2 felt flower broaches and a "Teacher's Day" sash, my mission was accomplished in 2 days. I was so engrossed in my work that I decided to 'close' my kitchen for one evening. My two girls jumped for joy when they heard that they get to order Pizza delivery for dinner. Sound like I sew and craft better than I cook :)


With a tattoo on one arm and a gift for her teacher Eunice, Ning was all set to go to school and enjoy her day with friends and teachers. 

This was another red and white project I did with the colors inspiration from the book of French GeneralHome Sewn by Kaari Meng.
The sash was given to teacher Eunice for being a good teacher

Tuesday, May 22, 2012

Chalkboard " DAYS UNTIL" Countdown Sign


I made a short trip to Singapore last weekend to attend a friend's graduation ceremony and to meet up with friends and relatives. One of the meetings was with Jeanie, the sister-in- law of my sister. Jeanie and her boyfriend, Adam, had left the U.S. to work in Singapore since last December. I wanted to bring them a gift and I thought something for their apartment would be a good gift.


[ifc22[1].jpg]
Picture from Infarrantly Creative

I have seen a chalkboard project here for a "days until" sign that I planned to make one for my home as our family love the excitement of anticipating upcoming events and holidays. I thought this would also be a perfect gift for Adam and Jeanie. With this sign, they can look forward to holidays, events, and perhaps the day that they will go home to visit family and friends.


As I had mentioned on my last post "Mini Chalkboard Wooden Flower Pot Stand", the on going renovation of my new house provides me with materials for craft projects. I picked some wood planks and batons scraps from the site to work on some chalkboard projects.


Click here for tutorial page

First, I select a wood plank with the perfect length to make this sign. I measured the space allocated for both the wording and chalkboard. Then I headed straight to a sign maker near my area to order 2 sets of "days until" vinyl stickers. With the given measurement and selection of typo, the store sign maker was able to get it done for me within 15 minutes. . I didn't even need to give them a soft copy. I paid a mere RM2.50 (US$0.80) for each set of the stickers.

I wanted to start working on the project as soon as I got home from the sign maker but had to hold it back because that was a busy day. The next day, the day before my departure to Singapore, I was able to complete this project between my busy schedule o running errands and overseeing the landscaping work at the new house. I always believe that there are times to craft if you know how to prioritize your work. 

In the evening, I wrapped the sign with other gifts I prepared for friends and relatives.  I was looking forward to a short break from home and meeting up with people I care about in Singapore.


Wednesday, May 16, 2012

Mini Chalkboard Wooden Flower Pot Stand


My husband and I bought a new house about 20 months ago and it has since been going through some rigorous renovation works.  I took the opportunity to use some of the remnants from my new house renovation to create all kinds of craft projects. The workers are current laying down the parquet flooring and there are plenty of wood to play with!


A coat or two of chalkboard paint, the pot stands are ready for you to scribble on it!


While the workers were busy laying down the timber flooring, I took the some batons scraps to make these mini chalkboard flower pot stands. The best part is that I get help from these workers to saw the batons with their electric saw.  Ha, that saves my trouble to saw the wood by hand! With the available wood adhesive on the site, I glued the batons into flower pot stands and sprayed paint it with my new toy - chalkboard paint.

Chalkboard paint is not easily available in Malaysia though they are factories manufactured this paint for export. I am very lucky to have a bottle to play with. While I have not try it myself, I have learned that it is pretty simple to make chalkboard paint. Grout is a key ingredient and I saved some from the balance of the recent tiling work at the new house. I am looking forward to trying it out soon. Click here for a tutorial for making chalkboard paint.

My daughter Ning wanted one pot stand. She objected me doodled on hers.


I need to get few more cactus to fill the empty pot stand.


The newly bought cactus plants sit prettily in these mini wooden flower pot stands. Lovely! I will find a nice spot for them when I move into the new house.

Tuesday, May 1, 2012

What can you do with your old worn handbags and fabric scraps


My experiences traveling to the Northern Vietnam many years ago had taught me to not be wasteful and conserve even the most easily available resources in my daily life.   On one of my visits to Shawn’s home, a Hmong young girl, for sewing lessons for a few Hong girls in her village, I witnessed how the family treasured every little piece of materials.  It does not matter that it is new or old cloths; every tiny piece of materials were salvaged for sewing projects that are an essential part of the family income.  Resources are scarce in the mountainous region in Vietnam and people who live here learned to conserve every single resource that is available to them.   The other part of the world known these efforts as reduce, reuse and recycle; but it is a way of life for the Hmong just because it is necessary.


Recycle materials/accessories from your worn out handbags
I don’t’ usually buy products that are made with PU synthetic leather because they do not last very long.  But I somehow still have two handbags made with this material. As I expected, the outer layer of the handbags began to flakes off within two years of light use.  It is very frustrating and wasteful to trash these bags when other parts of the handbags are still in good condition.  The accessories on the bags are something that I can recycle and I especially like to keep the zippers which are not available for sales in regular stores.   So, I dismantled the zippers, hooks, rings and canvas slings from the handbags.  I can easily recycle these items in my crafting and sewing projects.
A friend of mine decided to give me her old handbags that she was ready to throw away when she heard about my good stories to recycle the parts.  Being frugal and resourceful, I examined her stuff and found two of the handbags are still in decent condition.  My weekly cleaner was happy to adopt them.  As for the rest of the bags that my friend gave me – I stripped all the parts off over a TV show.  These materials will reappeared in better forms in my new projects in the future.


Saving fabric scraps for new projects
I have the habit of keeping fabrics scraps but, in the past, I would usually throw away pieces that are smaller than the size of my palm.  Upon my return from Northern Vietnam, I started to keep even the tiniest fabric scraps from all my sewing projects.  Being a little OCD (!), I would organize the fabric scraps by the sizes and kept them in different containers for easy access.   These scraps come very handy for various sewing projects, for mending torn clothes, making collage artwork with kids, and more.  As for those tiny winy pieces, 
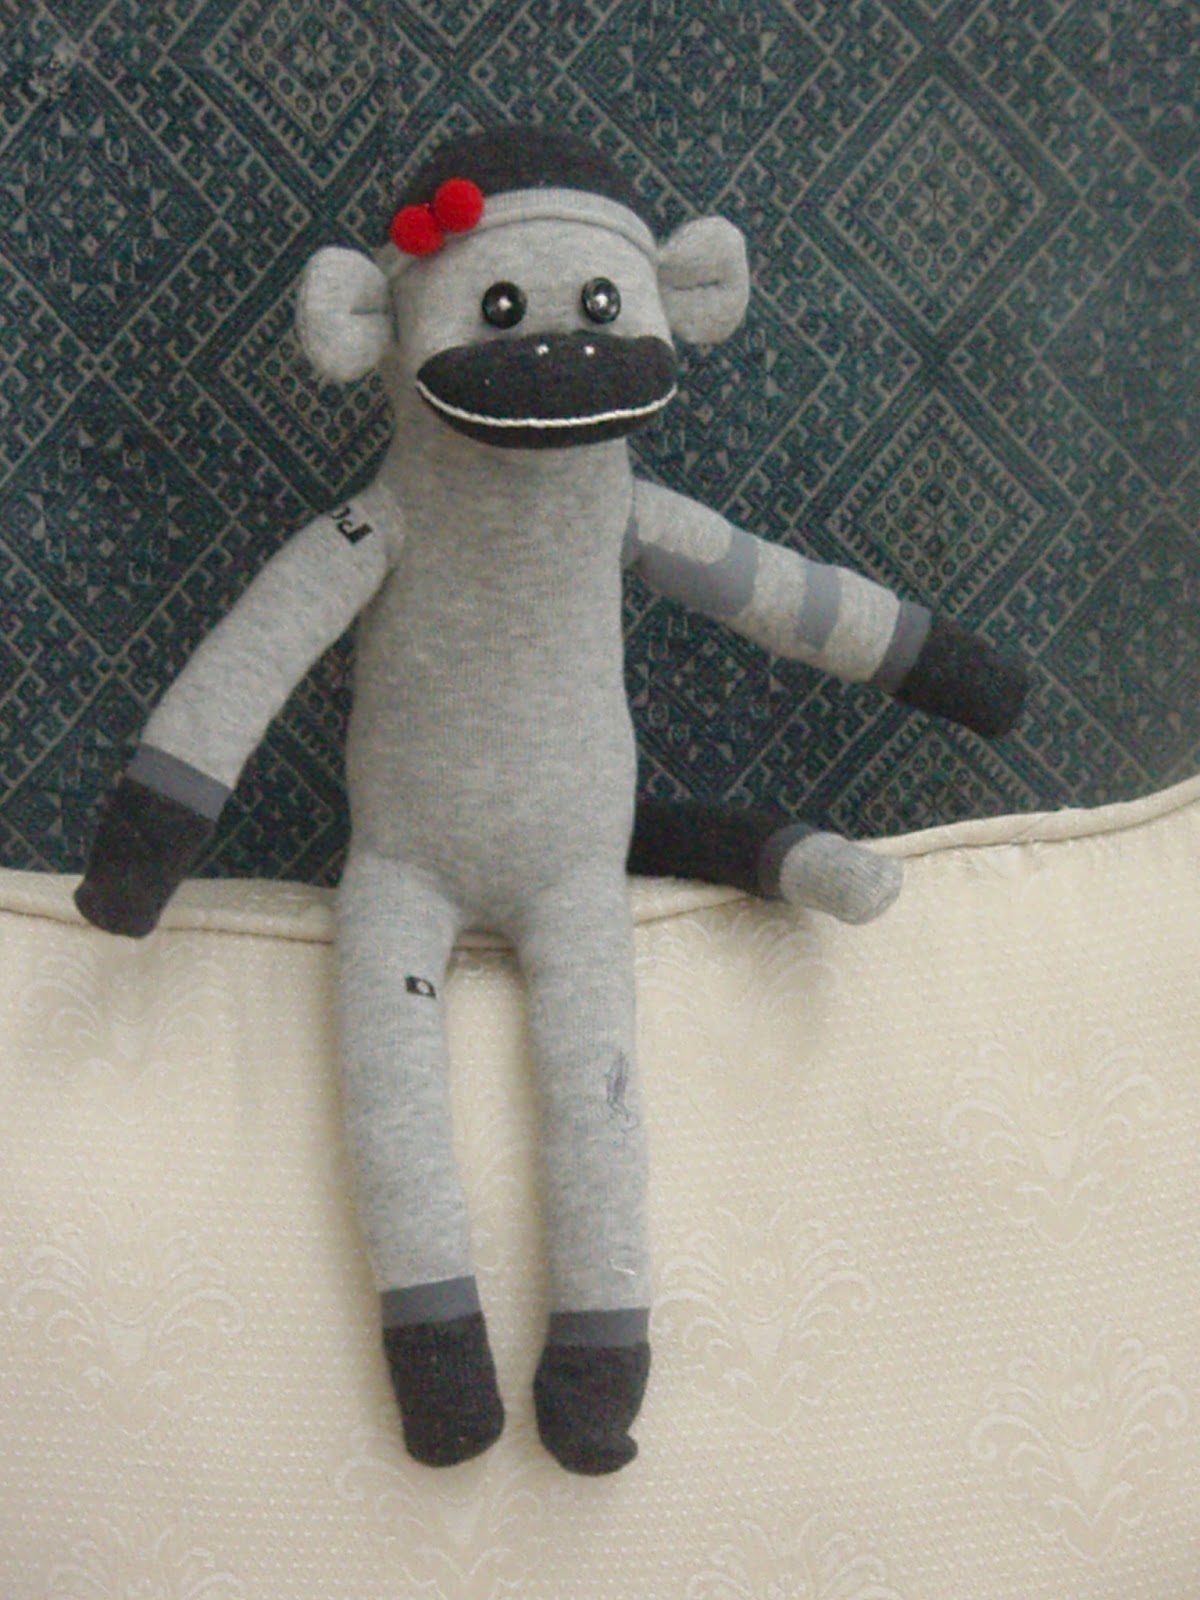
I use it to fill my hand made toys.
Obviously I don’t throw away old, torn or stained clothes.  I keep them in a box and use them for all kinds of projects,  I use fabric from my old Indian cotton blouse to me the faces of my “Bu Wa Wa” (Click here to see the article). 
So the next time you are thinking about throwing away any of your handbags, old clothes, fabric scraps or anything else, try to take another look of the materials and think of what you can do with it. 


First Giveaway Winner


The first giveaway was unsuccessful with only one follower responded. Hence Jun Yin you are the winner without competition! Please give me the initial you like to have for the 2 cutlery bags.


The feedback I had was the giveaway is not interesting. Thank you all for reading my blog and given the feedback. It helps for a new blogger to advance further.

Saturday, April 28, 2012

Patchwork Blankets - Labor of Love

A Grandmother's Garden Quilt
Picture from better-homes-gardens
My grandmother used to make us patchwork blankets when I was growing up.  Her favorite designs are similar to that Grandmother’s Garden Quilt that you can see in the picture left.  Grandma made all her blankets with fabric scraps and she would patch the pieces together using the traditional English Paper Piecing methodFor as long as I can remember, the hexagons on my grandma’s blankets are typically around 6 – 7cm in diameters - a little larger than some of the shapes on patchwork blankets that I have seen. My guess is that grandma did not have the patient or time to work with small hexagons.

Having that said, I will always get a new blanket from grandma whenever I outgrown the blanket size that I had. Grandma eventually had to stop sewing when her eyesight can no longer supports her to do such delicate works. However, her blankets continue to keep her grandchildren warm and cozy at night and for many years after she stopped sewing.


My first patchwork blanket


I love grandma's blankets and the hexagon patchwork. In fact, I made my first patch blanket with the hexagon design using the English Paper Piecing method. I made the first blanket for my wedding bed based on my memory of how my friend's mother was making it during my regular visit to her house when I was a teenager. Today, after almost 14 years with little torn here and there on this blanket, I am still using it to keep myself warm and comfort each night. 

I was not exposed to many other fancier designs of patchwork or quilt in the past.  Everyone in this region seems to be making patchwork blankets with hexagons (Grandmother's Garden Quilt), square or rectangular shapes. Today, I had seen many beautiful patchworks using different shapes and patterns. But my favorite shape for patchwork remains the hexagon. There are so many possible designs you can create with the hexagon.

I have been making patchwork blankets for my kids since they were babies. Zen complains her elephant quilt blanket to be too warm and heavy. So, I started making a new one for her since 2 & 1/2 years ago!  I made it everyday at the beginning of the project. Then I got distracted and started taking break for days in between my sewing, eventually days turned into weeks and weeks turned into sometimes months. I made other sewing projects in between because I need seeing some finished projects from time to time.  It gives me a sense of accomplishments. I am spending more time making the blanket recently and it is because we are moving into our new house very soon. It will look beautiful on her new bed.  I purposely use an old bed sheet to sew the backing of the blanket because seasoned fabric is softer and more comfortable. Zen loves the lightness and softness of her new blanket and she also like the beautiful prints on it.


I didn't really have a clue of the design I first started the project. I was thinking I can create some random designs hexagons and diamonds that I had basted with loose stitches. I had chosen pink and green printed fabric for the color combination I added a bright pink plain fabric for a contrasting color effects and to create a chic country look. The finished work is an unusual ladder shape. It may not be a spectacular piece of work as compared to the works of many experienced quilters, but it is priceless to me, I hope my girls will appreciate my efforts and treasured these blankets, and hopefully they will pass on the tradition to their children in the future!


You may find tutorial sites on sewing hexagon patchworks below
http://www.youtube.com/watch?v=UcvpA3lqtkM&feature=related
http://www.ehow.com/how_8623212_sew-hexagon-quilt-block.html
http://www.quilterscache.com/G/GrandmothersFlowerGardenBlock.html

Monday, April 23, 2012

My Three Stooges Sock Toys

Three Stooges


I bought my first craft book using socks in 1985 when I was still in secondary school (high school).  It became one of my collection of three craft books. I don’t remember if I ever made any of the toys shown in this particular book, but they no longer appeal to me these days.


Though sock toys existed as early as the 19th century and regained its popularity back in the late 20th century, it was not known among many Malaysian until very recently.  I re-encoutered my passion with this form of arts when I came across a fascinating craft book in a bookstore a few years ago,  It was a craft book by a Taiwanese author, Danta.  I was inspired by his wonderful ideas. So, I bought it. 

I went through our socks at home and gathered few socks for the project as soon as I was home. Eagerly, I studied the structures and took tips on making  sock toys. I picked a pair of my husband's socks which are still  new for my first project because I love the simple design of men socks. Not following any sample from the book, I created this creature of my own( See picture on the left). This is not his original look. (Note his original look on the group photo above. He had gone through one plastic surgery to get his sexy lips and the big round eyes).                
I named him Muichi after the makeover. What's the meaning of the name? Well, this creature purses his lips like a child who is about to cry. The Cantonese call this " Mui Mui Chou". That’s how the Mui came about and Chi is simply to rhyme with it. Muichi is an innocent and loving creature. He is often being taken advantages of and therefore, he purses his lips all the time :)


My second socks creature was made with my daughter’s old socks. Meet Fri who is very friendly and was born on a Friday. 


Sock Monkeys: (200 out of 1,863)
About a year later, I discovered the coolest sock toys craft book - Stupid Sock Creatures by John Murphy and Sock Monkeys (200 out of 1,862) by Anne Svenson+Ron Warren on Amazon.com, a place I bought many of my books.  These are black and white photos book of 200 sock monkeys out of the authors astounding collection of 1,863 vintage sock monkeys. These books cost more at our local bookshops but I was fortunate to have a mailing address in the U.S. and an annual personal delivery service to bring them back to me . 


Polo has a long tail


I was so inspired by the book and after looking at 200 vintage sock monkeys, my third sock toy was naturally a sock monkey. It was made with brand new male  socks. Of course, the socks owner, my husband, hassled me for cutting his socks  again! The label for the sock is Polo, so it was named Polo.


It has been quite a while since I made Polo. I had with me two pairs of original Rockford Red Heel socks bought from Chicago last autumn.  It awaits my good mood to make craft out a classic sock monkey.

Click here for a tutorial from YouTube to make a classic sock monkey. With all the free tutorials available online, you don't even need to buy crafting and sewing books these days. Unless you are like me,  who doesn't always have access to the internet, and who loves hard copy versus the computer screen  It is a treat to own a book!

Wednesday, April 18, 2012

First Giveaway


It has been more than 18 months since I started this blog. I think it is time to thank you all who have been following by a giveaway gifts. At the same time, I am taking this opportunity to welcome new followers. 


To enter the giveaway is simple, just


1) Leave a comment here on this post
2) You must be a follower. If you are not, join/follow me on my new Linky button at the top of my sidebar if you are not Blogger.
3) For additional entry to win, please post the giveaway to any of your social networking sites (facebook, blogger and/or twiter), and don't forget to leave a separate comment her for each social networking site you posted the giveaway to. Please inform me on this.


If you choose to remain anonymous, please leave me your email address so I can contact you. You may email details to me at yannsjournal@gmail.com if you do not wish to leave email address on the comment column.


Giveaway closes on 30 April 2012. Winners name will be drawn and announce on 1 May 2012.


Winner may select only single alphabet for each cutlery bag. The alphabet appliqué fabric would be same or similar to the picture shown above.

Open to all 18 years and older

Friday, April 13, 2012

Handmade Cutlery Bags


NYZ - Ning, Yann & Zen


I consider cutlery bag an essential traveling item so I can keep the cutlery set safe and clean. It is useful for  kids who take their meals in school and adults who dine out regularly. Other than the reasons that it is more eco-friendly  and hygienic, I just do not enjoy eating with disposable cutlery. 

Every Saturday, my girls and I have to eat  in the car or at their learning centre  when we have to rush from one class to the other. The restaurants which I usually buy our food always supply me with flimsy plastic disposable cutlery. I think it is wasteful to dispose them after single use and I do not like to eat with them anyway. I used to pack our cutlery sets by wrapping them in serviette and threw them inside my bag. In fact, that was not a good idea. My daughter Zen stays back after school for curriculum activity every Wednesday. She has her lunch in school and need a proper storage for her cutlery set. Therefore, making cutlery bags for the family is something that I have been thinking about since last year. 

Made with unbleached burlap from Thailand


Rubber stamped cupcake applique
Unbleached twine recycle from paper bag
Made with unbleached cotton


I like the natural appearance of unbleached materials. For this project, I use unbleached cotton, laces and even the twine for the draw string. They are all natural and free from chemical bleach and dye -  ideal for storing cutlery or food item.

Do you like to have these bags in your chosen initials? Look out for Yann's Journal first giveaway that is coming up soon!